With all these girls, we need bow holders!
They can get expensive to buy and they're not too cute!
Follow along as I make a beautiful bow holder.
They could be made in all different colors etc..
I chose to make these very simple and girly-girly!! :)
This one is for Tamara's youngest "berry girl!"
SURPRISE! ;) LoL!
OK, here's how I made 3 tonight...
I created this to be one step at a time so you could make your own if you wanted to! They are fun to make!
I bought the wooden plaque at Michael's.
I screwed in the hardware at the top to hang it by.
Then, I painted the top "layer" in ivory.
It dries very quickly as you only need a thin coat.
It's a bit hard to tell in the picture but I am painting the other layer pink. If you look to the right side you can see where I am painting the pink and then I continued until I made it all the way around.
Now it's painted all the way around. :)
Let it dry but it won't take long.
....so I had bought....
I had bought a couple other wooden pieces to add to the project to make it just absolutely girly and pretty!
I wanted to make them different because the tiara one is for another of Tamara's "Berry girls!" :) SURPRISE! lol
You will need some tacky glue. It's cheap, no worries!
After they had dried (maybe 5 minutes) I used the tacky glue to glue on the little wooden pieces. I think they look so cute.
...then...
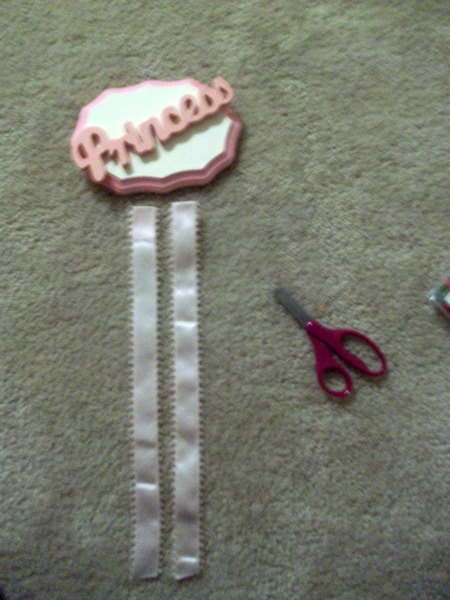
You choose what ribbon you want and cut it to the size you would like. I chose a girly ribbon with little loops. The ribbon part without the loops is about an inch wide. You want something about an inch wide so it holds the bows nice and securely. :)
.......now......
a little "trick" of mine..
Use a lighter or candle lighter to go gently across the bottom of the ribbons. It's better than fray check and it prevents fray check without the stains that fray check leave behind! :)
(I had an online boutique for 4 yrs so I learned)
...then another little trick of mine...
makes it easy!
I simply fold the little ribbon at the top over some and just use a thumb tack to hold the ribbons in place! It's easy and holds better than glue and there's no need for nails! :)
Wallah! It's finished!
Now see what they look like when they are hung on the wall and used!
This one is for my Hannah Joy. I hung it in the bathroom where I fix her hair! :) Easy, peasy to see what bows you have and easily access them. Plus, I think they look cute hung up!
I found out quickly that I need a second one because she has MORE BOWS!!!! lol ;) (I make bows too! I will add a tutorial here one day on how to do that. So, check back!)
I think my Hannah Joy's looks cute hanging there!
Tamara, I hope you like the two I made you.
One with the princess for the youngest berry and one with the tiara for the next to youngest berry! xoxoxo :)
I hope everyone enjoyed this little tutorial!
Smiles!!!
 Read more...


 ~Hope~
 ~Madison Grace~
 ~Sarah Faith~
 ~Hannah Joy~